How to personalize Glassware by using Waterslide Decal Paper
Glassware that is personalized has become an increasingly popular method to make distinctive gifts, mark occasions, or enhance the look of your home. Utilizing Waterslide decal paper, it is possible to achieve high-quality results in the privacy in your own home. This comprehensive guide we’ll walk through step-by-step the process of employing water slide decals for inkjet printers, inkjet decal waterslide papers, waterslide decal inkjet papers as well as water slide decal papers that can be used with laser printers to customize glassware easily and with precision.
What Is Waterslide Decal Paper?
Waterslide Decal Papier is a versatile craft material for transferring intricate designs to various materials, such as ceramics, glass, metal as well as wood. It is available in two types that include water slide decals printed with inkjet as well as water slide decal papers to print with laser printers The medium lets you create customized decals that stick seamlessly to the surface you want them to adhere.
- Inkjet Waterslide decal paper is designed for use using inkjet printers. This paper is best used with a sealing spray in order to safeguard the ink.
- Waterslide decal paper to use with Laser Printers: Laser-compatible paper is free of sealing sprays because of its toner that is heat-set which makes the process more efficient and more labor-efficient.
Materials You Will Need
Before beginning, collect these items:
- Waterslide Decal paper (compatible with type of printer)
- Inkjet or laser printer
- Sealing spray (for inkjet paper)
- A craft knife, scissors or scissors
- A bowl of water that is lukewarm.
- Paper towels or soft cloths
- Glassware (wine glasses, mugs, jars, etc.)
- Spray of clear acrylic (optional to add toughness)
Step-by-Step Guide to Personalizing Glassware
1. Design Your Decal
The initial step to create personalized glassware is creating the decal. Make use of graphic design software for example Adobe Illustrator, Canva, or Microsoft Word to create your art. Make sure your artwork is appropriate to the dimensions and form of the glassware.
- Opt for high-resolution photos to get a sharp and clean transfer.
- Recreate the design in case the design contains text, to ensure the correct orientation following application.
2. Print Your Design
Upload the water slide decals inkjet paper or the laser-compatible decal sheet in your printer and make sure your print is printed on a shiny side.
- for Inkjet Printers Print with high-quality settings and allow the ink dry completely prior to moving on to the next stage.
- To use Laser printers, Print the same way as you would for a regular printer before cutting the design.
3. Seal the Design (Inkjet Paper Only)
The sealing process is an essential process to the inkjet water slide decal to stop the ink from discoloring when submerged in the water.
- Spray the sheet of paper using a clear sealing spray.
- Apply three coats of light coatings. let each coat fully dry before applying the following.
- Allow the sheet to dry for approximately 30 minutes.
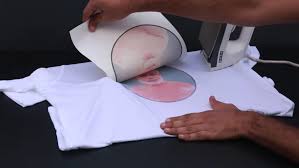
4. Cut Out the Decal
Utilizing the scissors or a knife Cut carefully around your designs, removing any extra paper to give a more professional look. Complex designs might require precise cutting equipment to achieve more effective outcomes.
5. Prepare the Decal
The decal that you have cut out should be placed in the bowl of water that is lukewarm. Allow it to soak for 30 to 60 minutes, and then let it sit until the cut-out is loose from its backing paper.
- Then gently slide it off the backing to ensure that it doesn’t tear.
- Beware of soaking longer than necessary, since this could weaken the adhesive property.
6. Apply the Decal to the Glassware
Place the decal in the glassware, and then gently slide it in place. Utilize a soft cloth or a paper towel to smooth away any wrinkles, air bubbles, or air bubbles.
- Begin from the middle and continue to work your way outward until you have an even end.
- Carefully handle the decal so that you do not cause stretching or tears.
7. Allow the Decal to Set
After the decal has been applied, allow the glassware remain unattended for about 3-4 hours, allowing the decals to dry and be firmly adhered.
8. Optional: Seal the Finished Glassware
To increase the durability of your design, particularly when the glassware is often used, spray an acrylic clear spray on the decal. This will ensure that the design will not be damaged by wear and water.
- Make sure to use even coats and light coats to prevent drips and the pooling.
- The sealant should be allowed to set to a complete extent prior to using the glassware.
Tips for Best Results
- Choose the Best Paper Make sure to use top-quality water slide inkjet paper or water slide decal papers to print with laser printers according to your printer’s type.
- Examine before applying Try it out using a small piece of glassware in order to improve your skills.
- Cleanse the surface Make sure the glassware is cleaned and free of grease or dust to ensure an optimal bonding.
- Beware of Dishwasher Use Wash your personalized glasses to ensure the durability of the design.
Applications of Waterslide Decal Paper
The possibilities for the waterslide inkjet decal are limitless! Make it into:
- Wedding wine glasses made to order to be used for weddings, events and other occasions.
- Mugs with personalized designs are thoughtful presents
- Branded jars and bottles are available to small companies
- Beautiful vases and other decorative objects
Conclusion
Customizing glasses with Waterslide decal Paper can be a fun and satisfying DIY task. If you’re working with the inkjet waterslide decal paper or waterslide decals that is designed for laser printers by following these tips, you guarantee stunning professional result each time. Be creative by transforming simple glassware into work of art that express the uniqueness of your design.